This article examines the process of seamlessly deploying a Fuel node using Spheron, a user-friendly platform that simplifies node setup and participation in the Fuel ecosystem.
What is the Spheron network?
Spheron Network is a Web3 infrastructure platform that provides tools and services to decentralize cloud storage and computing. It allows audited data centers to join the Spheron marketplace. Spheron oversees the decentralized and governed nature of the infrastructure, ensuring permissionless access and increased security for all users. Spheron Compute offers a feature-rich alternative to traditional cloud services for just a third of the cost.
Spheron offers a IT market, which allows users to quickly and easily configure valuable tools, whether they want to deploy databases, nodes, tools, or AI. With Spheron, you don't have to worry about technical aspects and can easily focus on deploying your node. Spheron Network has also partnered with organizations like Shardeum, Enjoy, Elixir, Filecoin, Arbitrationetc., to redefine access to it and promote a more decentralized, inclusive and community-centered ecosystem.
Spheron provides features like private images, auto-scaling instances, on-demand scaling, real-time instance metrics, faster GPUs, free bandwidths, Terraform providers and SDKs, instance status checks, activity, shell access, etc. Spheron provides complementary storage solutions for long-term data storage and edge bandwidth acceleration through its global CDN. With Spheron,You can easily configure your nodes in just a few minutes and benefit from low maintenance and operating costs and an excellent development experience.
What is fuel network
Fuel is an operating system specifically designed for Ethereum rollups. Its unique architecture allows rollups to resolve PSI (parallelization, minimized execution, interoperability). Powered by FuelVM, Fuel aims to extend the capabilities of Ethereum without compromising security or decentralization.
How to deploy Fuel Node using Spheron Compute?
Deploying a Fuel node on Spheron is a simple, streamlined process that requires no DevOps knowledge!
Step 1: Create a free Spheron network account
1. Visit the Spheron network: spheron.network
2. On the Spheron home page, locate and click the “Free try” button.

3. You will be directed to a registration page. Choose your preferred authentication method: Web2 (GitHub account, GitLab account, or Bitbucket account) or Web3 (Ethereum).
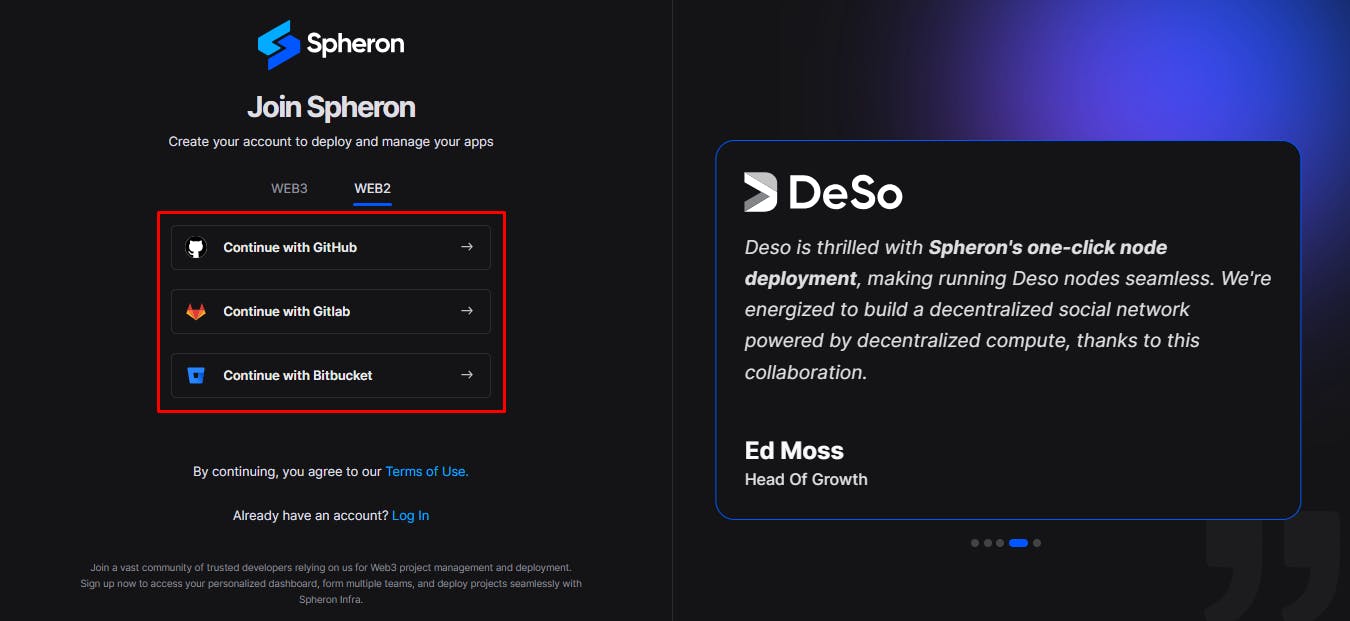
4. Follow the prompts provided to authenticate your chosen account securely. This step guarantees secure access to the Spheron Network platform. After successful authentication, you will be guided to a confirmation page confirming the completion of your account setup.
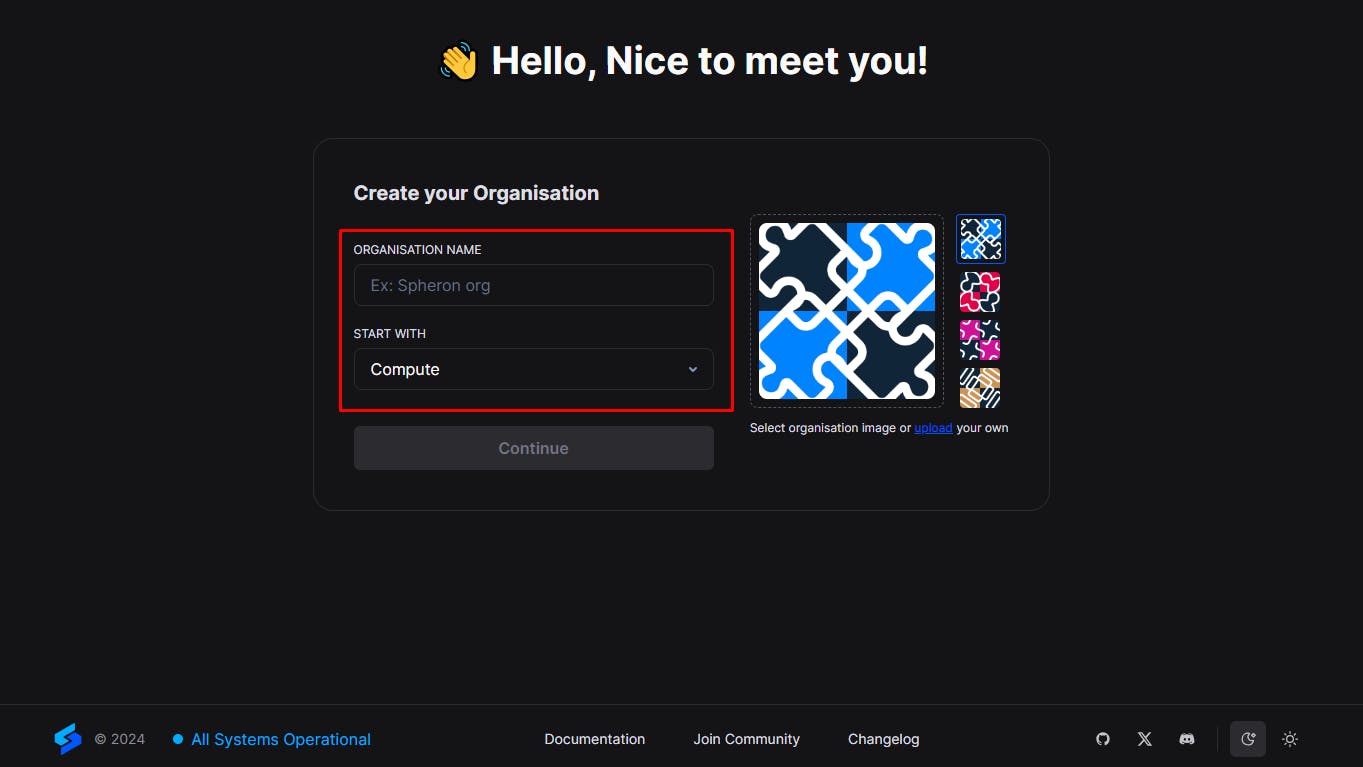
Step 2: Create an organization
1. Once logged in, you will be directed to the Create Organization page, where you can give your organization name and choose Avatar. Ensure the “calculate” The option is selected in the drop-down menu “Start with” option. Click on “Continue”.
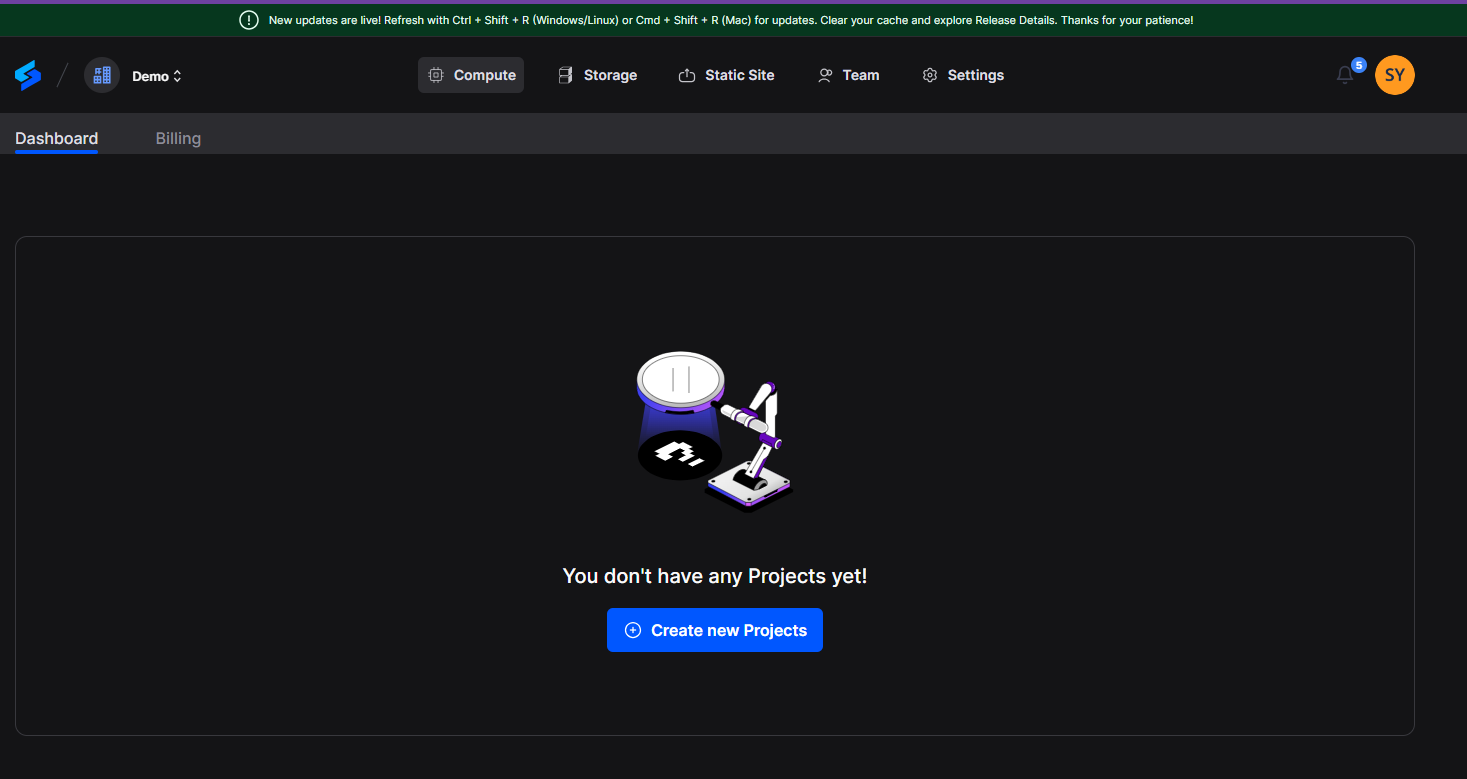
2. Then you will be redirected to a new page. Click it “Create new projects” button.
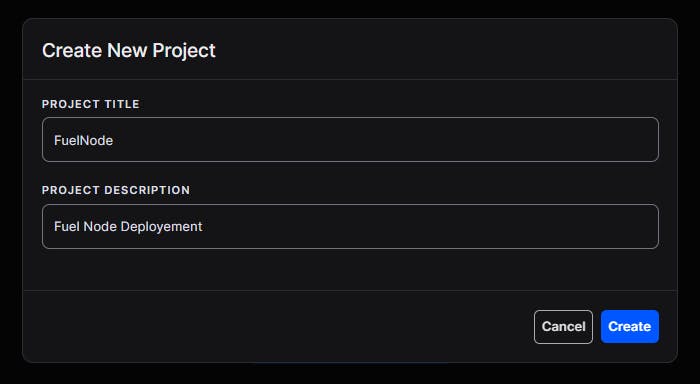
3. Add 'Project title' And 'Project description' and click Create.
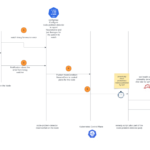
Step 3: Deploying a Fuel Node with the Spheron Platform UI
Follow these steps to deploy a Fuel Node:
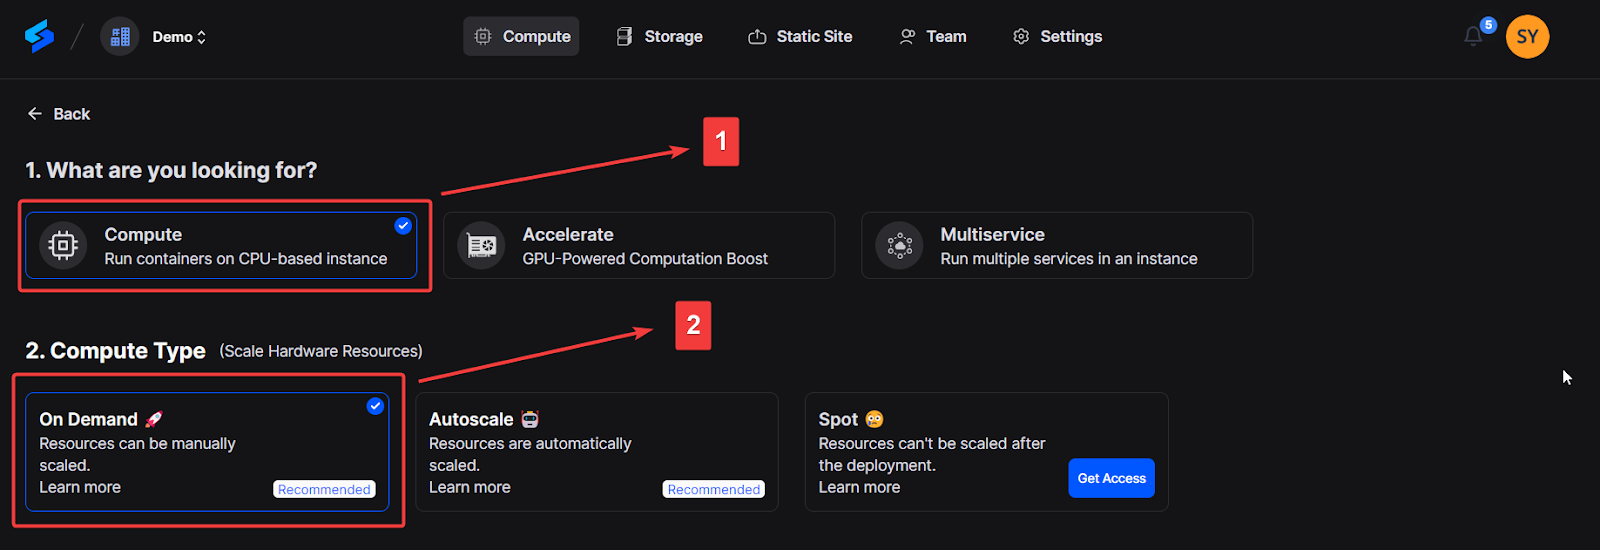
1. Choose “Calculate” to use CPU-based instances to run containers.
2. Choose the desired Calculation Type option under Calculation Type.
NOTE: Please schedule a team call to get early access to “Place” Type.
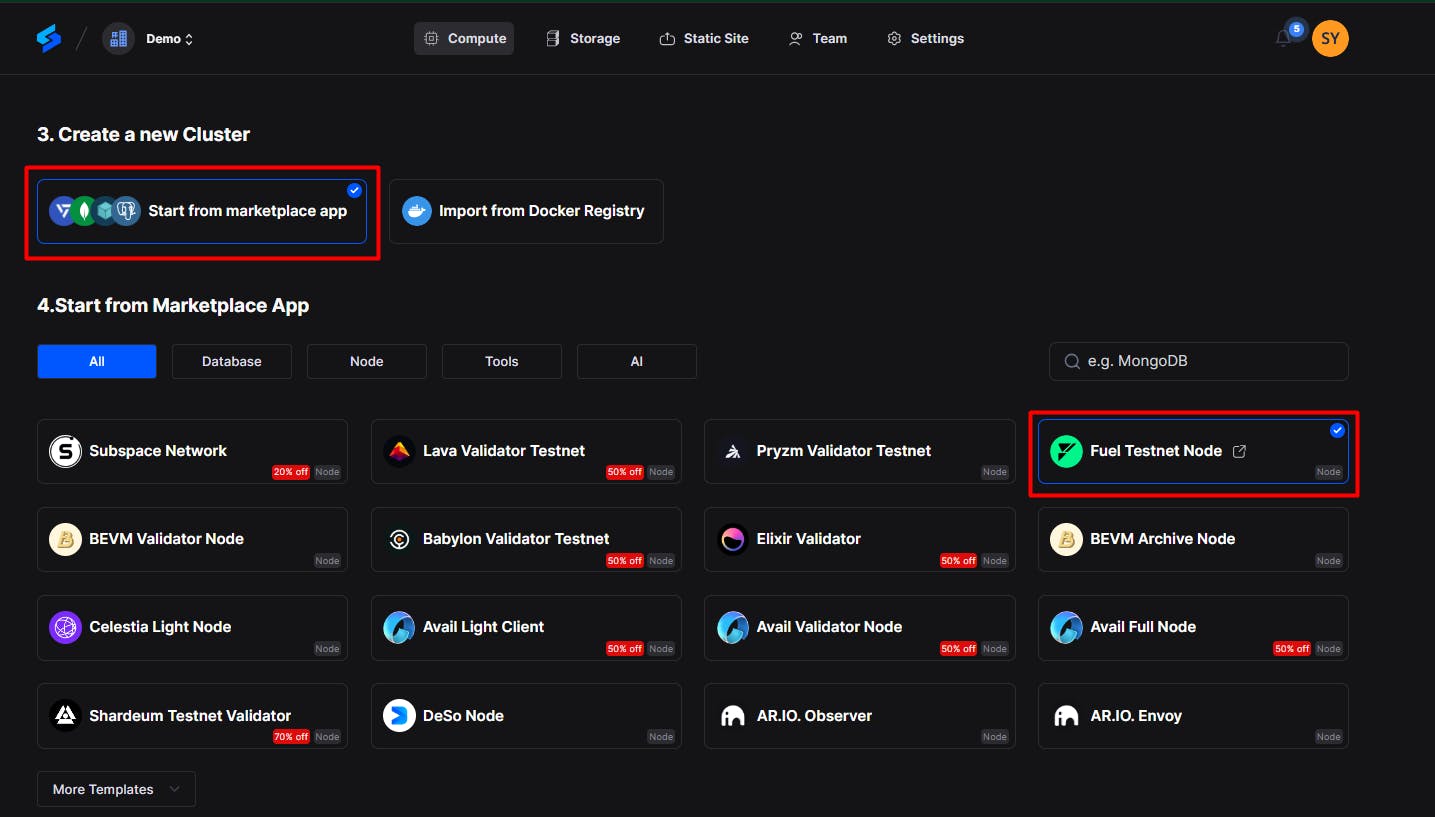
3. Click “Start from the Marketplace app” and select “Fuel Testnet Node” of the market.
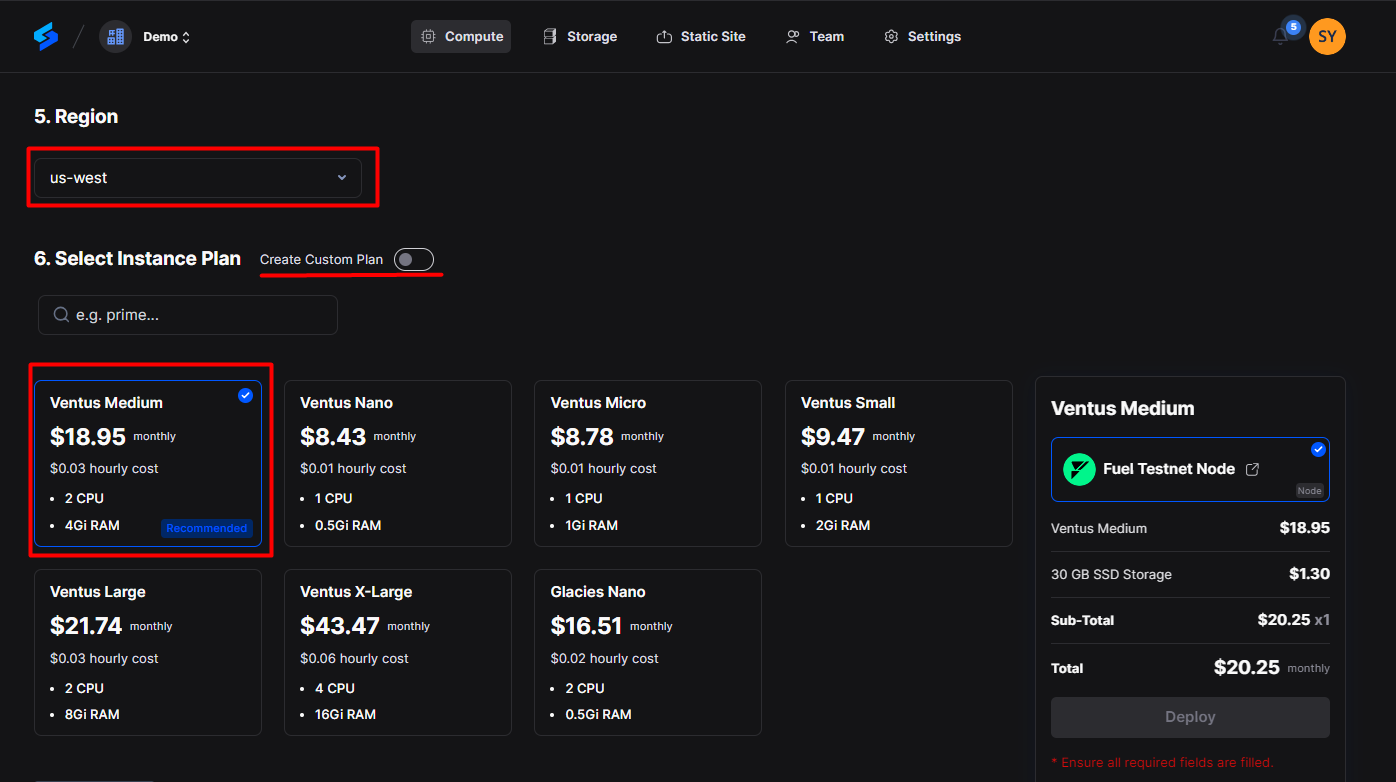
4. Choose a region: Select your preferred region for deployment. Choosing a region closer to you can improve performance and reduce latency.
5. Next, choose an instance plan that fits your needs. Spheron will recommend an appropriate plan based on the Fuel model, but you can customize it from the available plans or choose to “Create custom plans.”
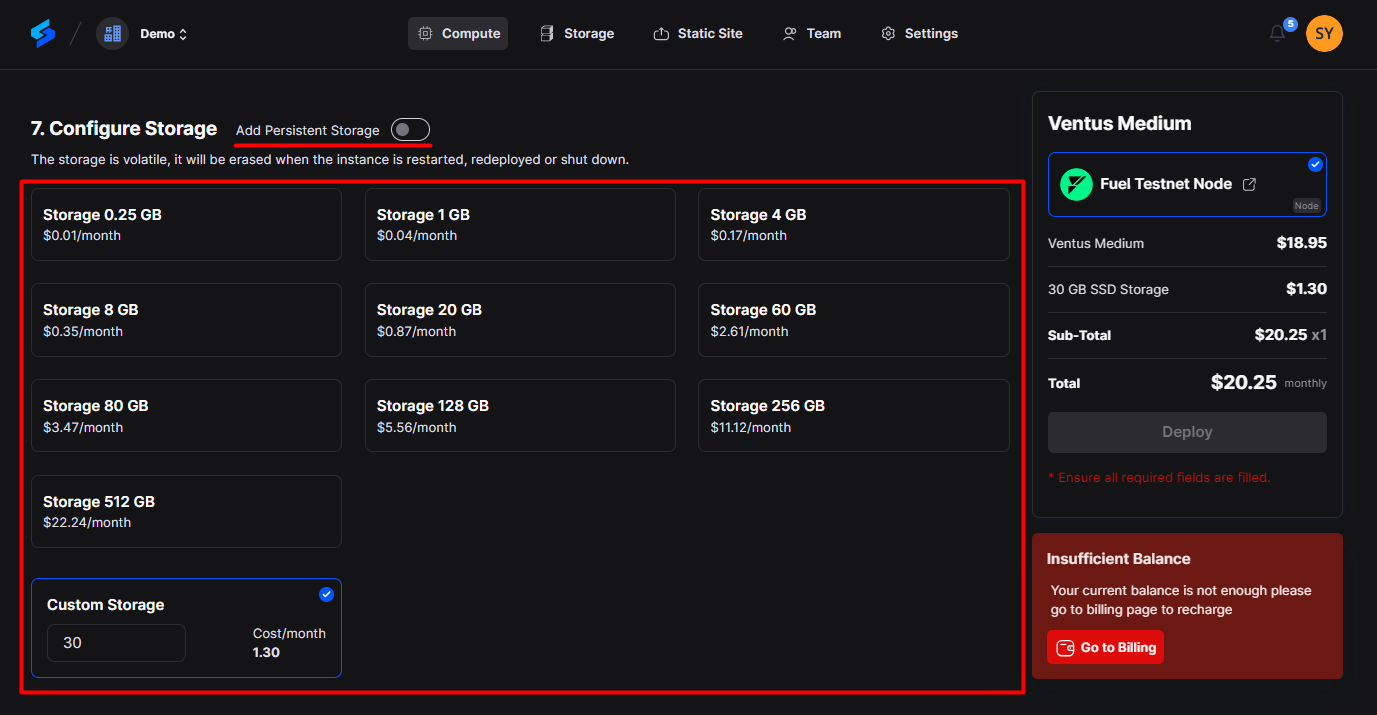
6. Next, configure storage: You need to choose storage from the available options or the custom storage option that suits your needs. This storage will be volatile and will be cleared when the instance is restarted, redeployed, or shut down. Additionally, you have the option to choose persistent storage.
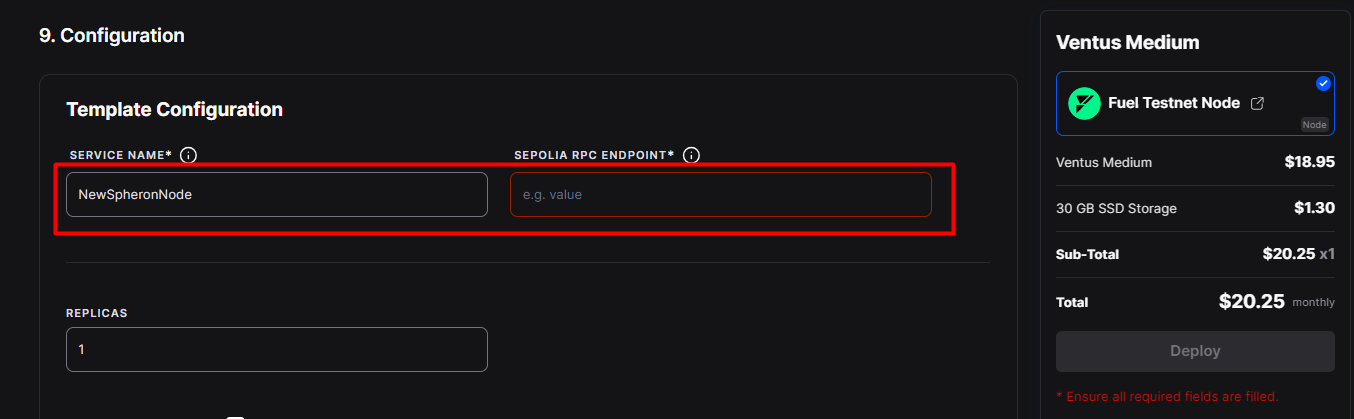
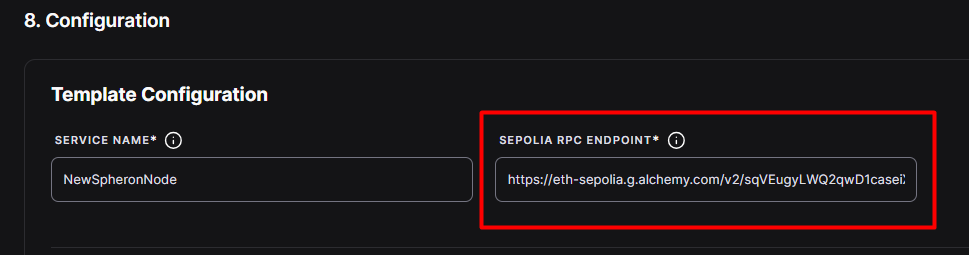
- Then go to configuration. In the 'Model configuration section, you will need to add 'Service Name'; for example, we will write “NewNodeSpheron” there. and add ENDPOINT SEPOLIA RPC.
Step 4: Get SEPOLIA RPC ENDPOINT
1. Go to alchemy.comSign up with your email id and create your account.
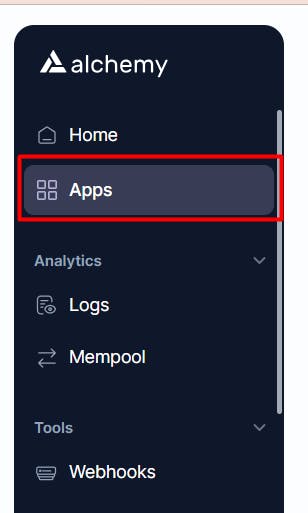
- Go to https://dashboard.alchemy.com/ and click 'Applications' on the second option on the left.
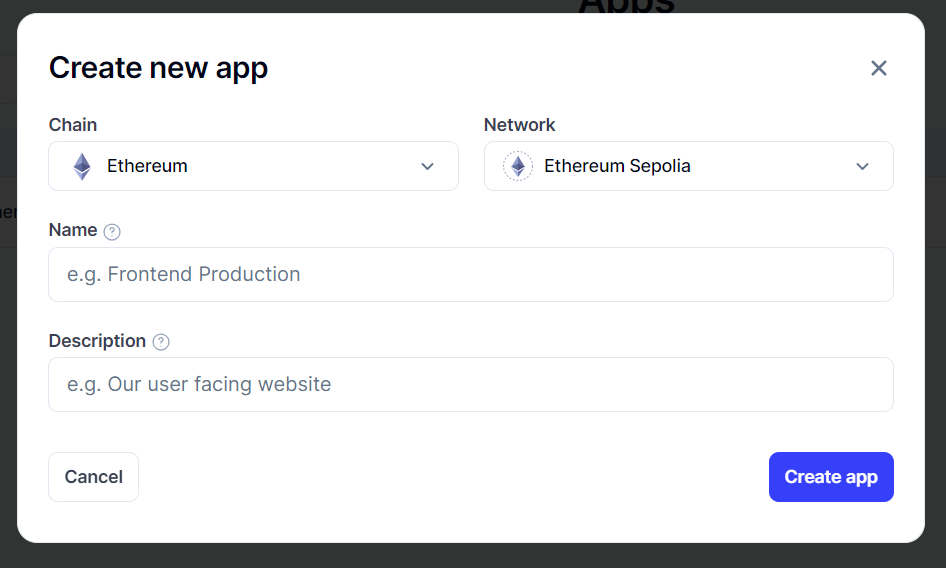
3. Click “Create new application”. You will get a pop-up screen where you have to choose chain under the name “Ethereum” And Network under the name “Ethereum Sepolia”. Give the app name and description and click 'create an application'.
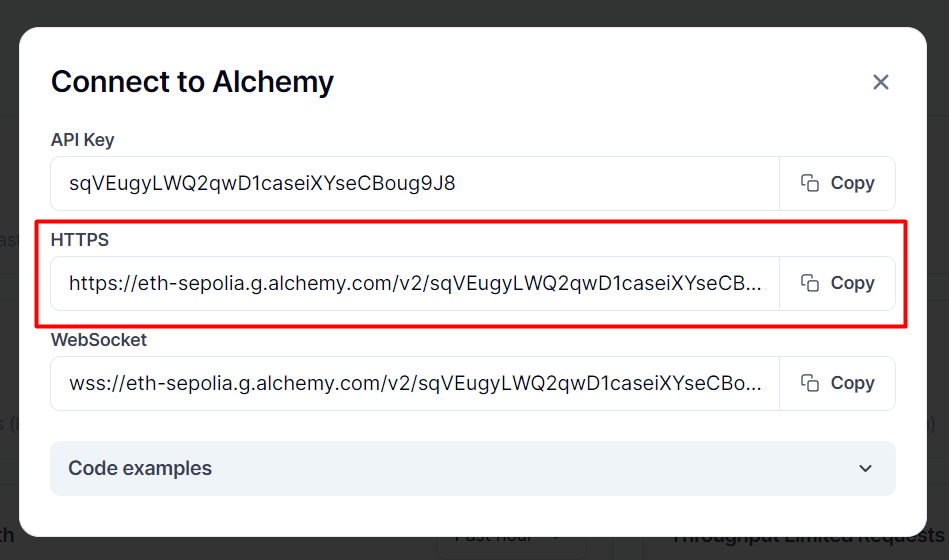
4. Then on the right side of the screen you will see the 'API Key' Button. Click on it and copy the HTTPS link from the pop-up window.
5. Next, go back to the Spheron template setup and paste the HTTPS link into the 'ENDPOINT SEPOLIA RPC.'
6. Click on the “Deploy” to deploy the node successfully.
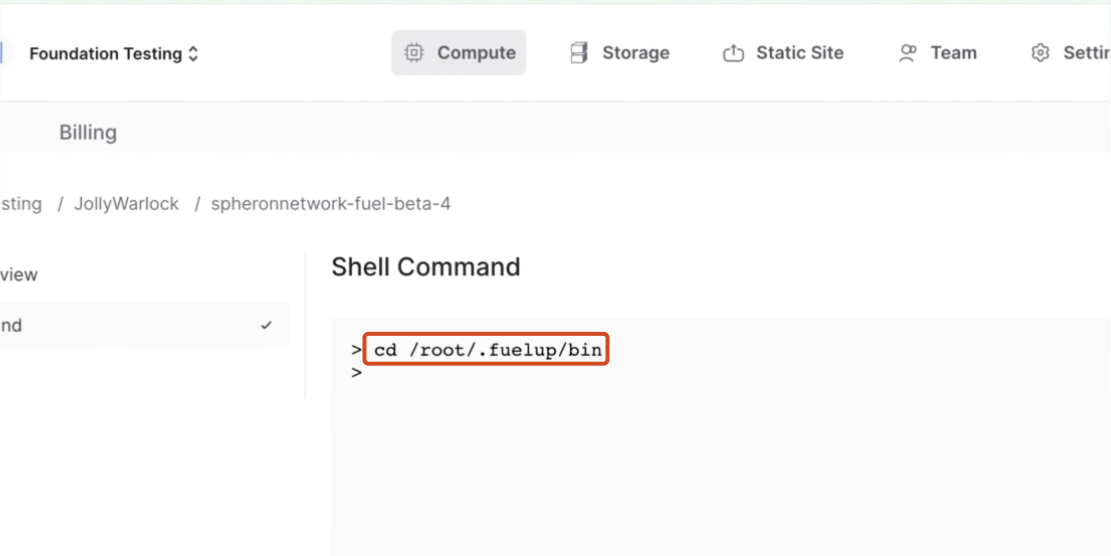
Wait until your node is fully configured. Once provisioned, you will see an option called “Shell Command” on the left side of the dashboard; Click on it.
Step 5: Create and Obtain a Fuel Wallet
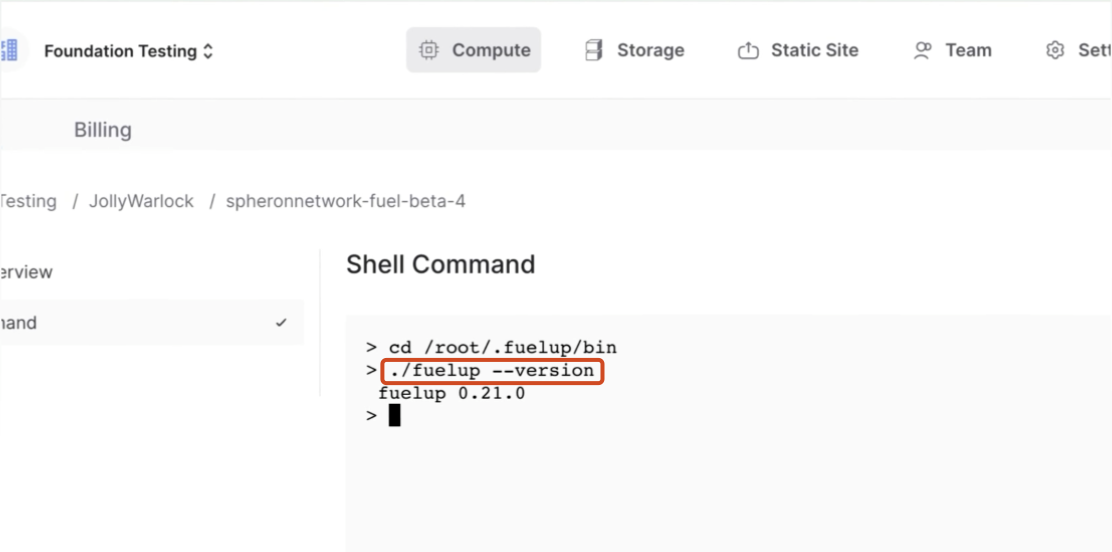
1. Access the “Shell Command” On the left side of the dashboard, click on it and follow the fuel wallet step by step commands to create a wallet.
cd /root/.fuelup/bin
2. This will display the current fuel version.
./fuelup --version
- Create a wallet
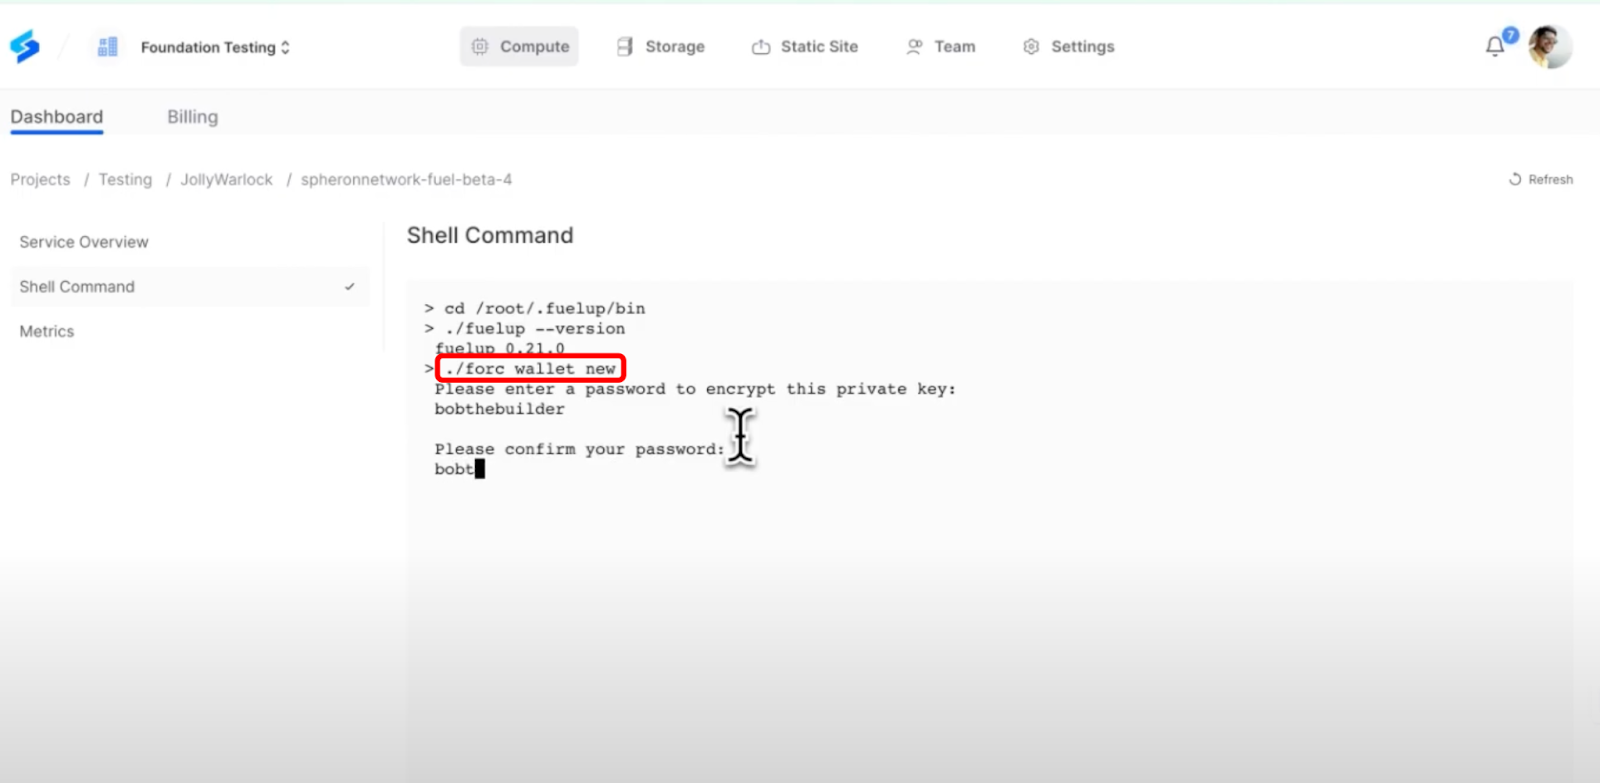
You must create a wallet before creating accounts and signing transactions with them. To do this, type the command below:
forc-wallet new
This will require a password to encrypt the wallet. Once the wallet is created, the mnemonic phrase will be displayed.
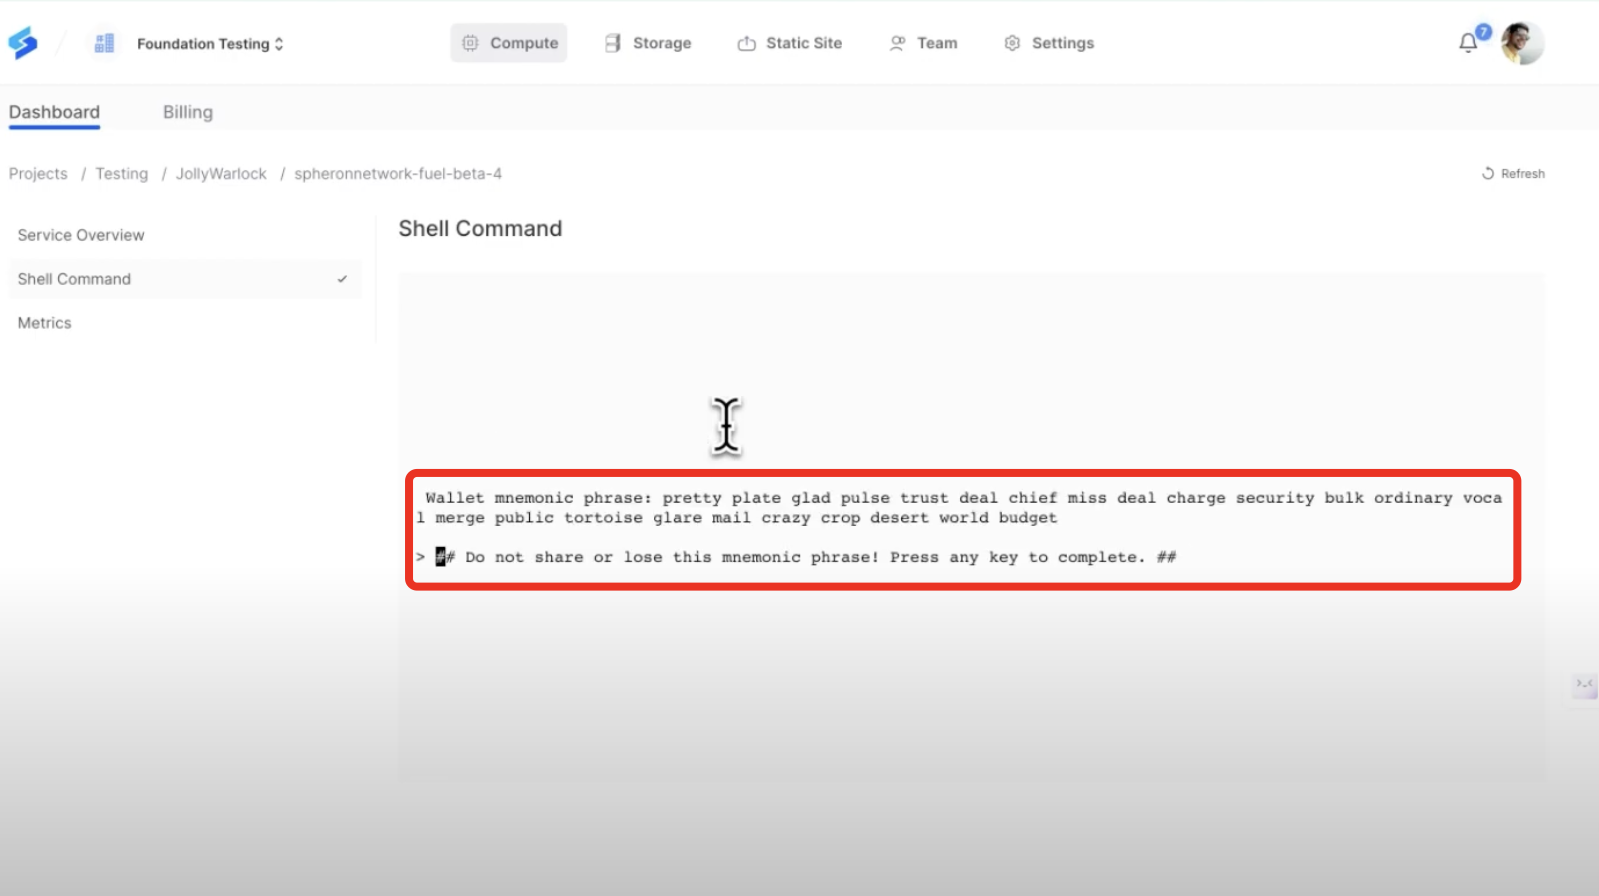
Note: You will need your password for signing and account derivation, as well as your mnemonic phrase if you want to recover your wallet in the future.
- Create an account
To create an account for the wallet and get the wallet address, you can do the following:
forc-wallet account new
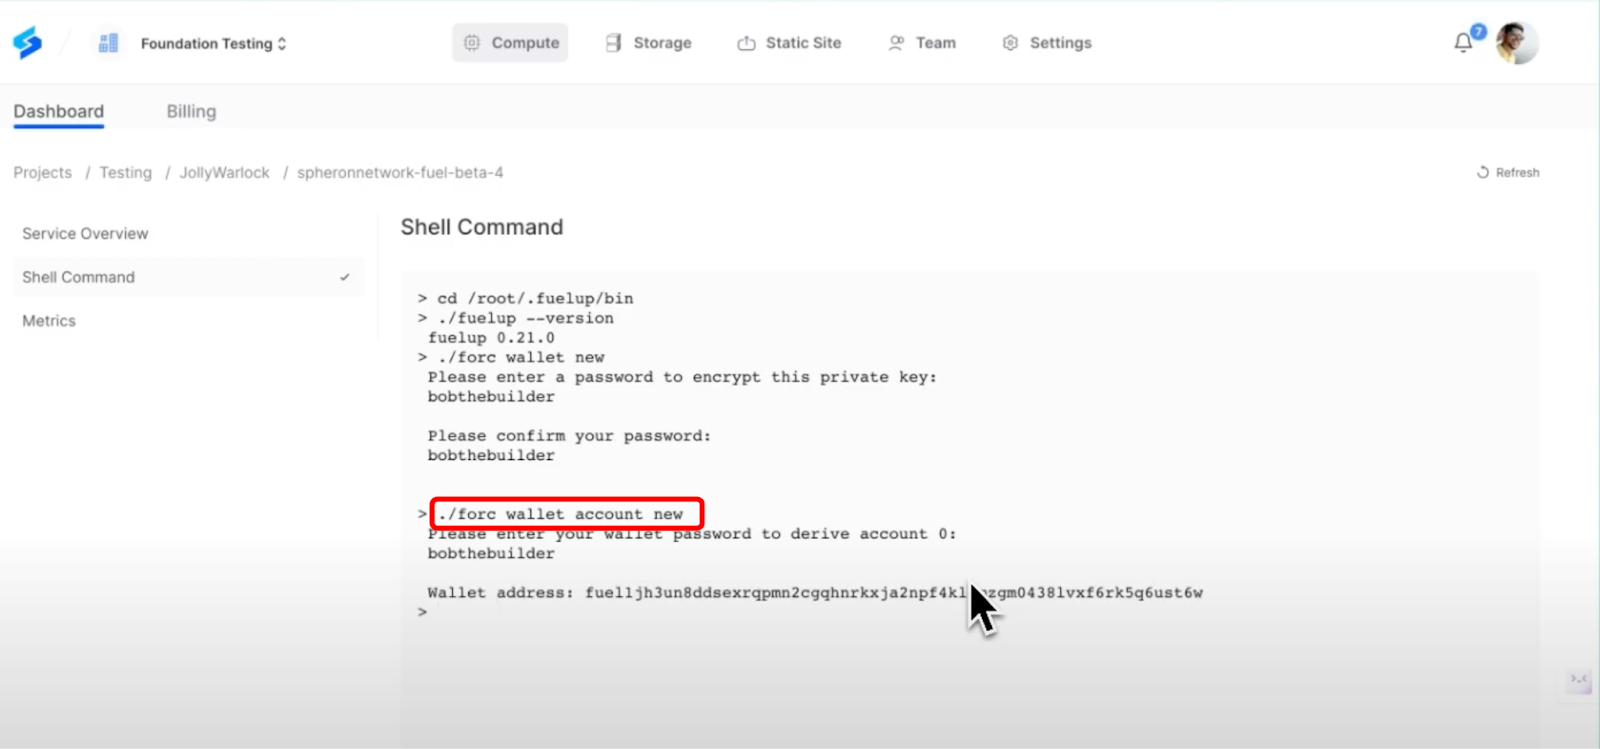
This will require your wallet password (the one you chose during creation). This command will always derive the next account that has not yet been derived locally.
- To list all derivative accounts so far, use the following:
forc-wallet accounts
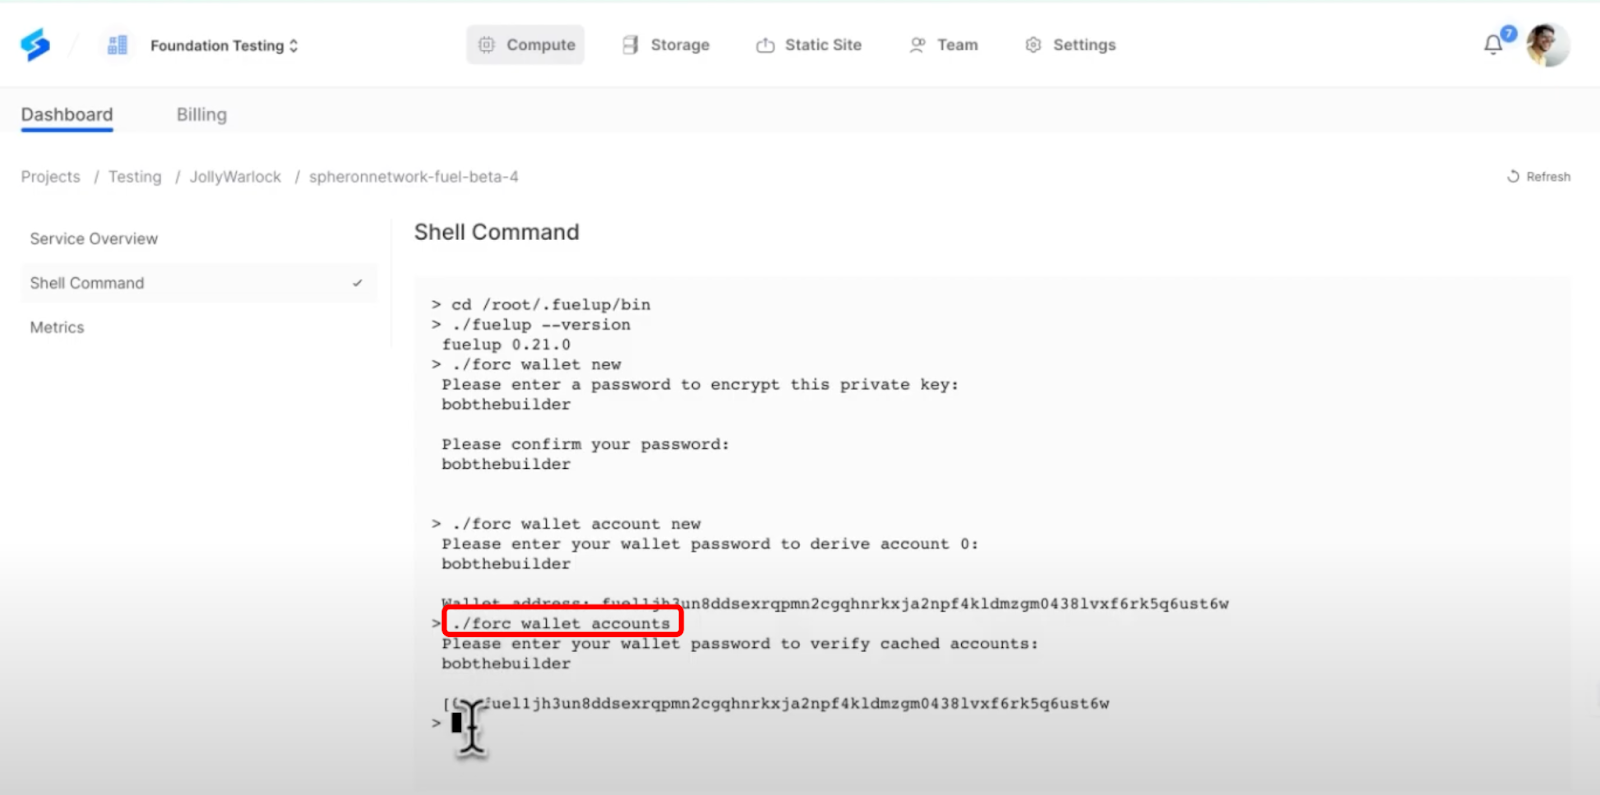
Note: When we “create” an account, we have just revealed it. All accounts are derived deterministically based on the mnemonic phrase and the wallet derivation path. forc-wallet Will cache public addresses of derivative accounts in ~/.fuel/wallets/accounts
Conclusion
In conclusion, deploying a Fuel Node using Spheron Network is a simple process that can be accomplished in just a few steps. With Spheron, users can easily configure a Fuel Node without extensive technical knowledge, making it accessible to a wider range of participants. By following the steps in this guide, users can quickly and easily deploy their node and contribute to the network.